this is an open source project released under the GPL Creative Commons license. You are free to copy, distribute, display, and perform the work to make derivative works under the following conditions: Attribution: ” You must give the original author credit”. Non-Commercial: ” You may not use this work for commercial purposes”
Do It Yourself!
with just 15$ of electronics and your own ability bring life to your E11 blaster!
(speakers and battery excluded)
or
Easy Assembly Kit
all schemes and pictures of this topic are mirrored here: www.facebook.com/fxblasterarduino
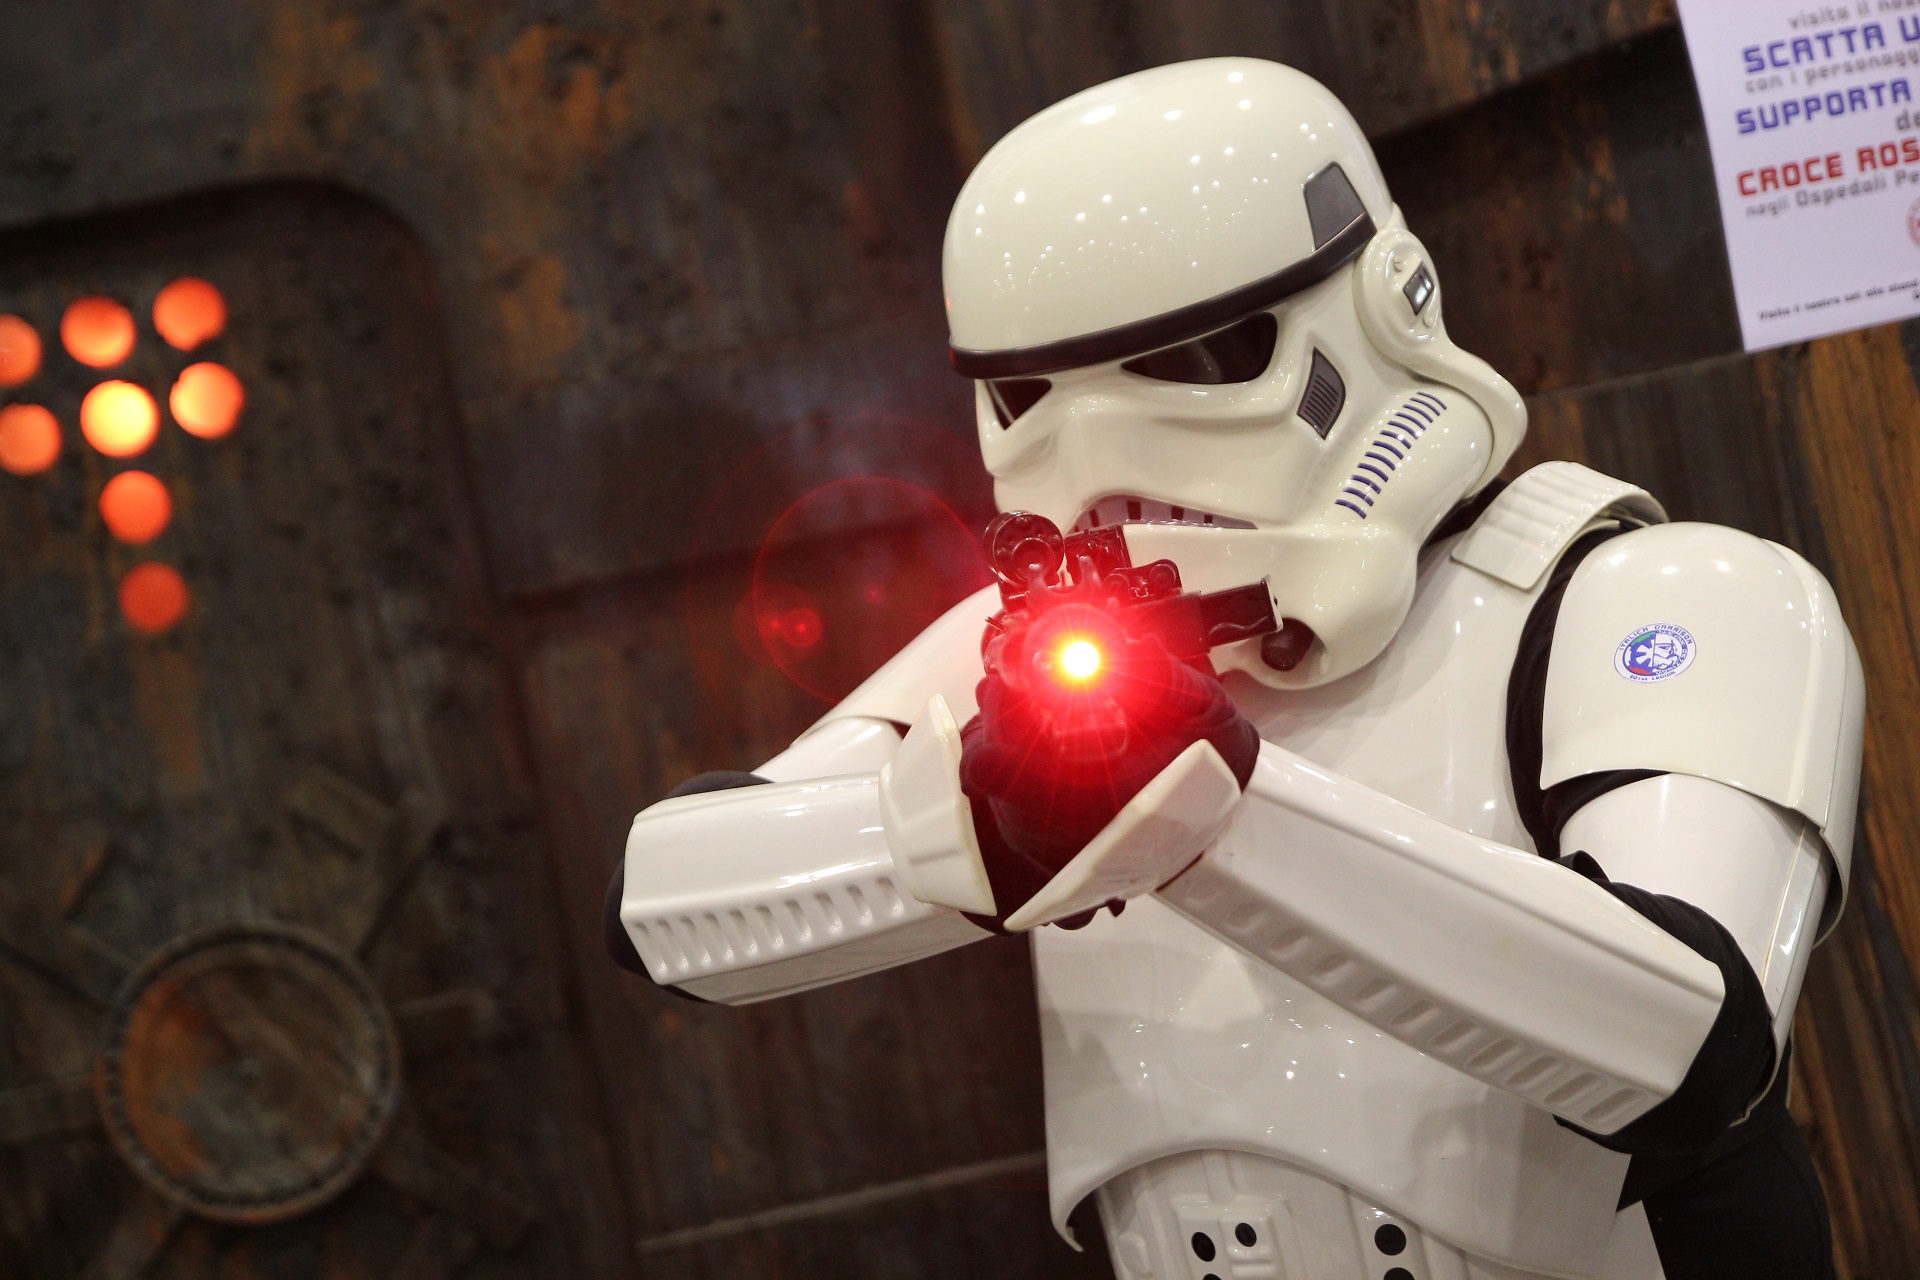
Main purpose of the project: an accessible device that supports high powered RGB led and sound effects for Star Wars E11 Blaster or any other prop/replica
What is Arduino? Arduino is an open-source electronics platform based on easy-to-use hardware and software. Arduino boards are able to read inputs – light on a sensor, a finger on a button, or a Twitter message – and turn it into an output – activating a motor, turning on an LED, publishing something online.
Final Work Video
Updated version (august 2014)
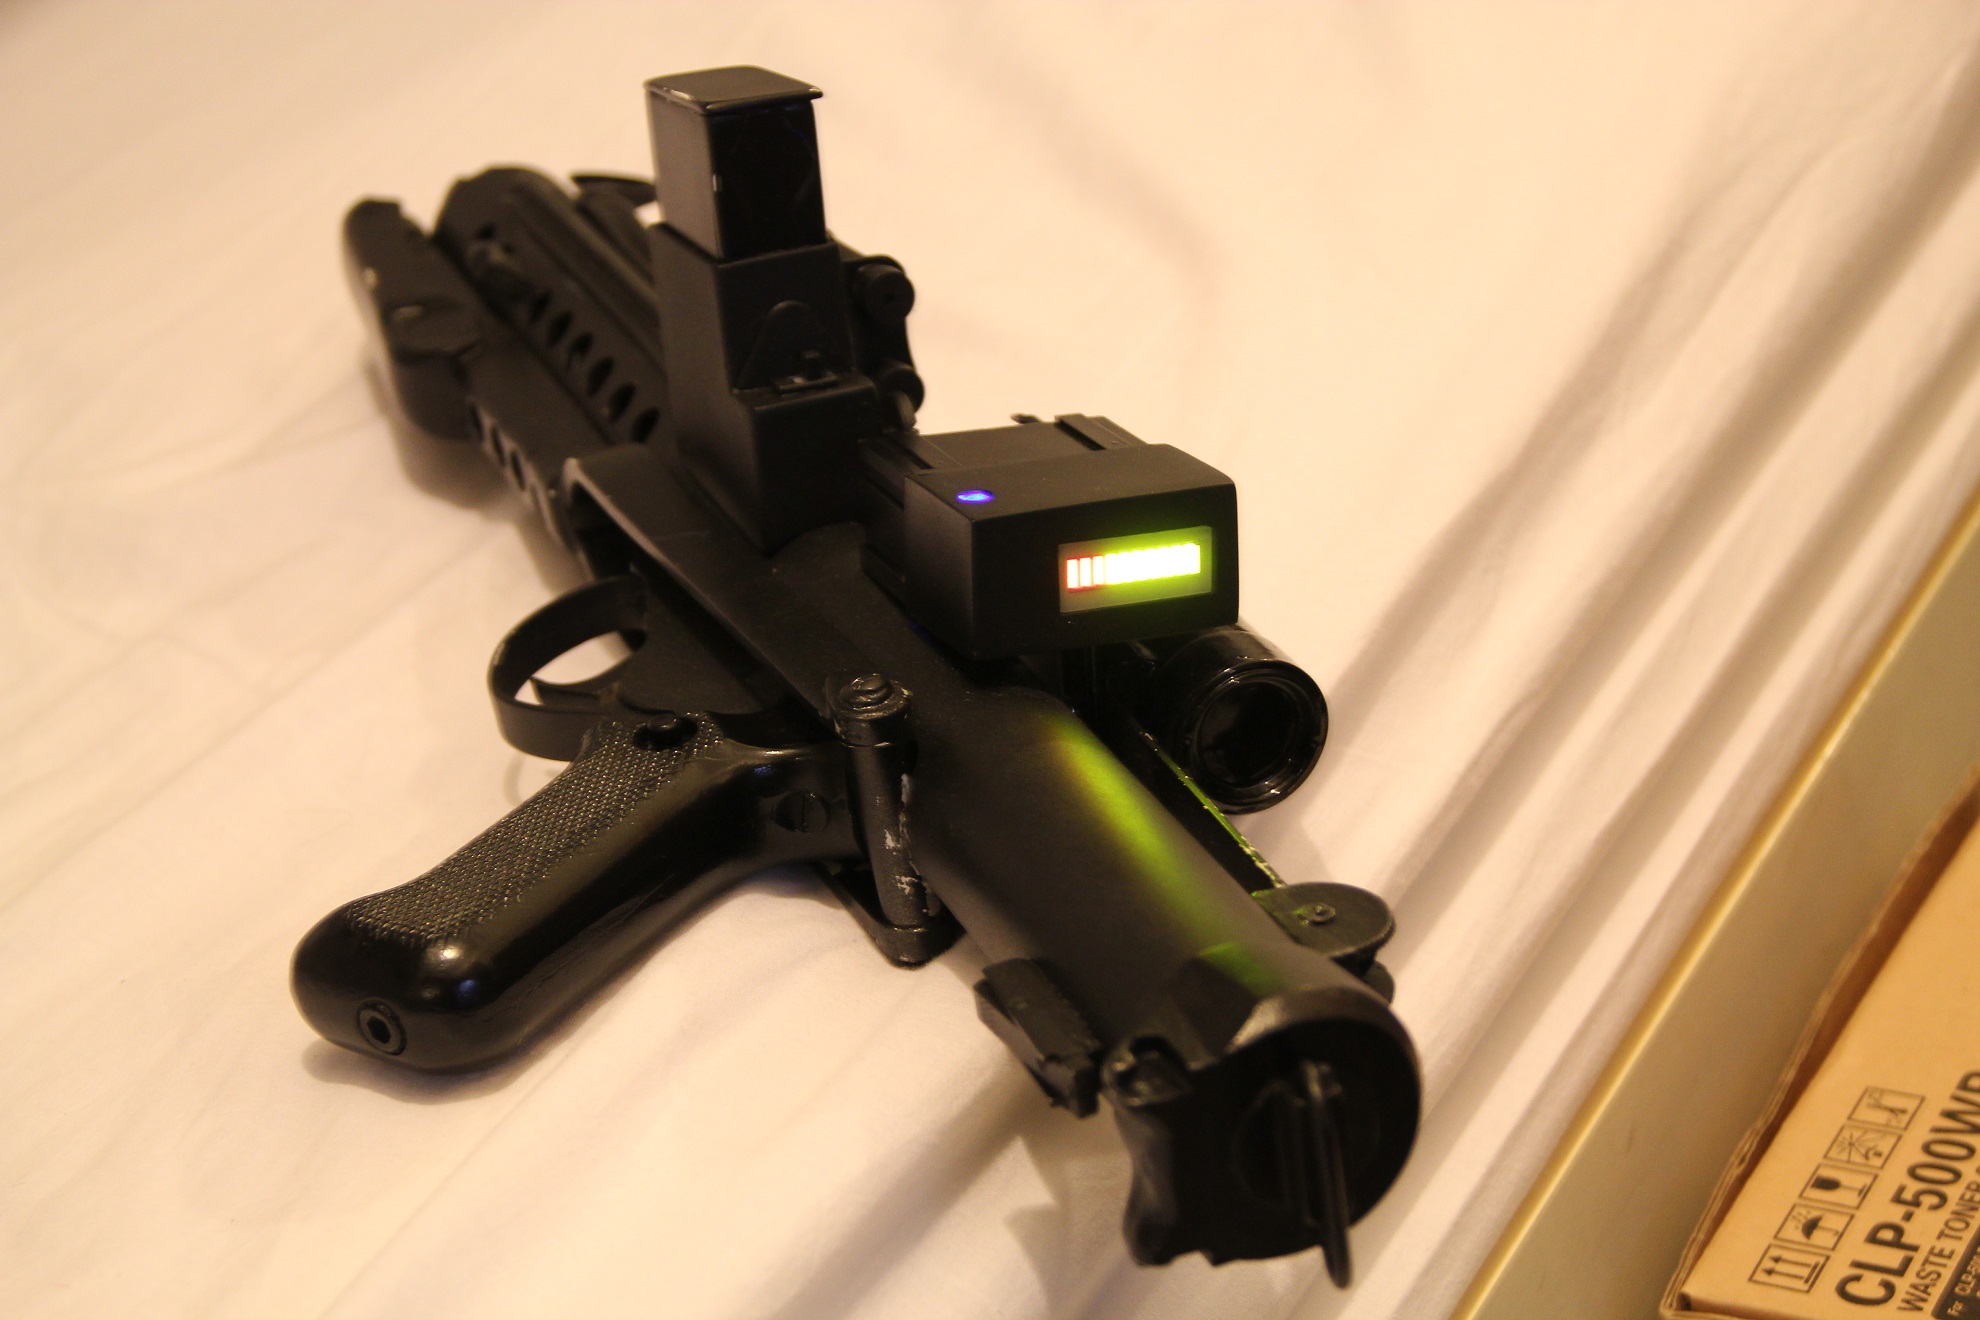
Final Work Photos
Main Features
(not final)
1) – SUPERBRIGHT 3 WATT RGB LED with customizable colors (256*256*256 = 16.777.216 colors!), blinking and fading effects
2) – Preset sounds from Star Wars and our Planet weapons, included (but not only): E11-fire, E11-Stun, Boba Flame, AT AT fire, Xwing fire, TIE Fighter fire, chewbacca and jawas random voices, 44 Magnum, M1 Garand..
3) – Play any music tracks as well (darth vader march when trooping!)
4) – SD Micro card support up 32GB of sound effects and music tracks!
5) – 3W + 3W amplified audio power ouput to deal with the noise generated by a crowd of people
6) – 3 switch buttons: Fire, Reload, Selector or Radio mode (when long pressed)
7) – Radio Mode: 45 minutes of stormtrooper radio chat in loop, a 110Mb mp3 file made by TK2243 here, to keep going when hold the blaster in the holster
8) – sound and light effect when empty ammo is reached
9) – sound and light effect when reloading weapon
10) – sound and light effect at start-up
11) – random Vader welcome voices at start-up
12) – green and red segments led bars as counter
13) – long battery life ca.7 hours (battery suggested: Lithium 7,4V 1400mAh)
14) – last but not least: Fart Machine! fart sounds as last weapon available (just for fun ![]() )
)
Change log from version 4.02L to 5.0
– Arduino Mini replaced with Arduino Mini Pro
– WT5001 mp3 player replaced with DFPlayer Sound module
– code and scheme updated
Change log from version 4.02H to 4.02L
– added radio mode when holding the select button more than 3 seconds
– added vader welcome sound at start up
– corrected bugs
– added WT5001M02-28P sound board support
Costs
Electronic modules (sellers mainly from China, free shipping):
- Arduino Pro Mini 5v At Mega 328 c.a. 2$
- Arduino USB to TTL adapter c.a. 1,30$
- DFPlayer mp3 sound board c.a. 2$
- 3W mini amplifier c.a. 1,50$
- 3x 350mA Constant Current Regulated LED Driver c.a. 1,35$ each
- 5V Positive Voltage Regulator 1,30$
Total: c.a. 12,15$
Leds:
- 3W led RGB c.a. 1,5$
- Led Bar Graph 10 Segments (3 red/7 green or any other colors) c.a. 2,50$ (i used this )
Total: c.a. 3,50$
Other components:
- speakers 2x 35mm diameter 57mm 4W speakers 9$
- batteries costs may vary, read below
- microswitch, resistors, wires, read below
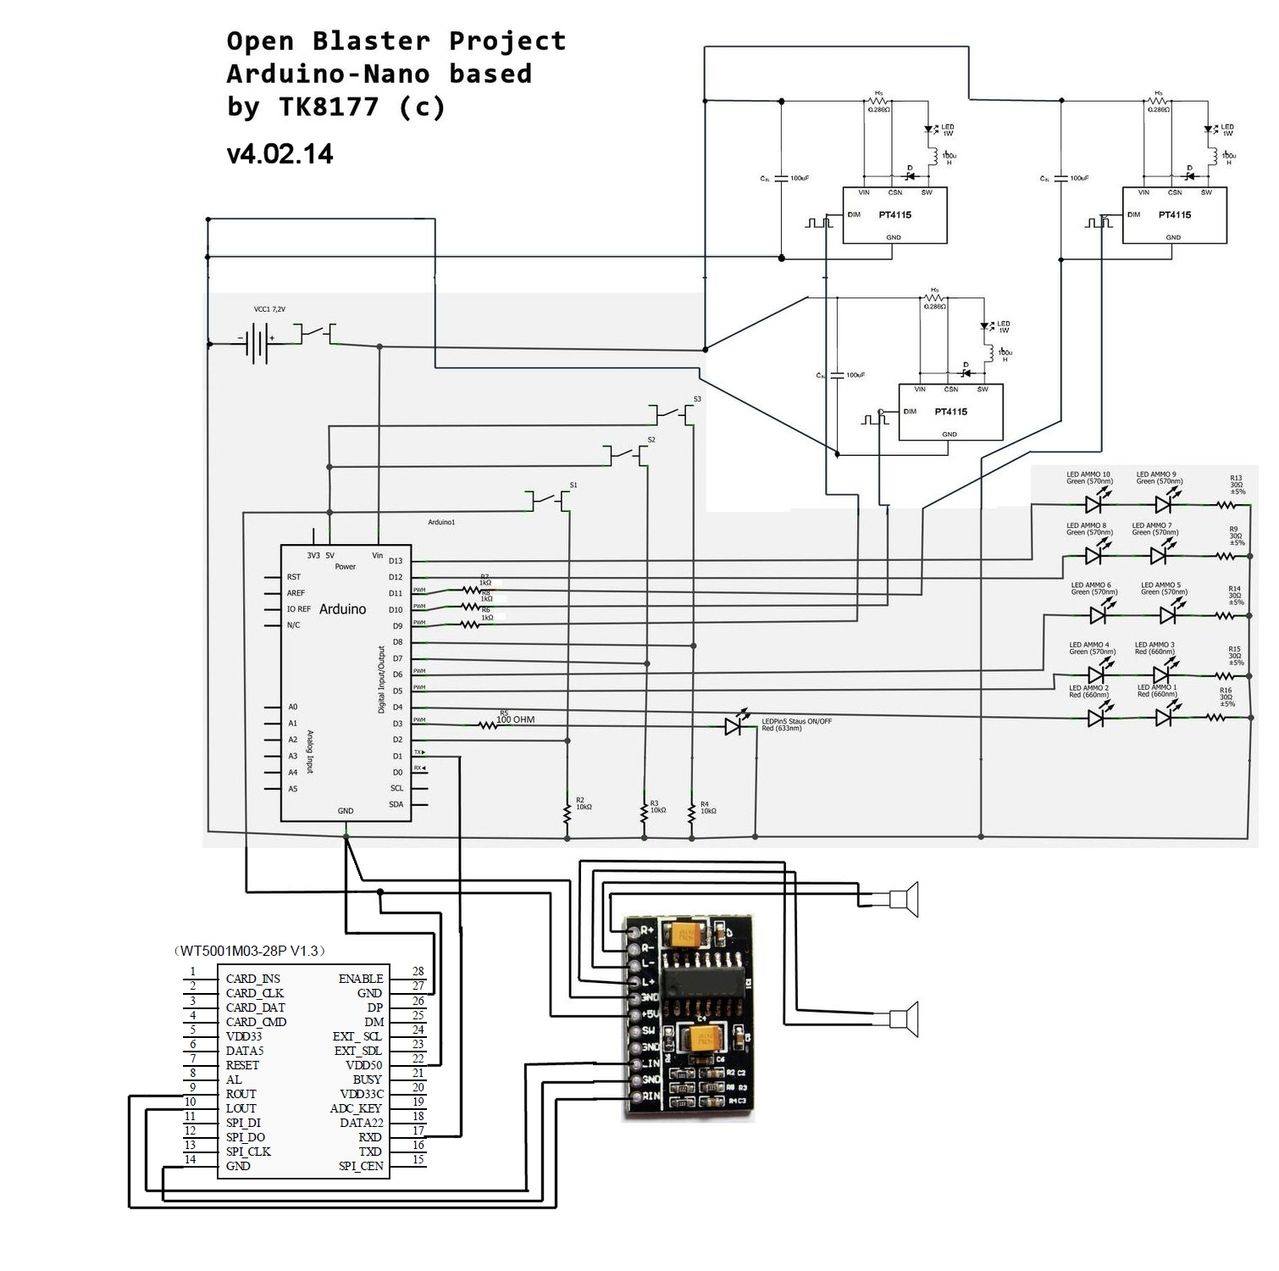
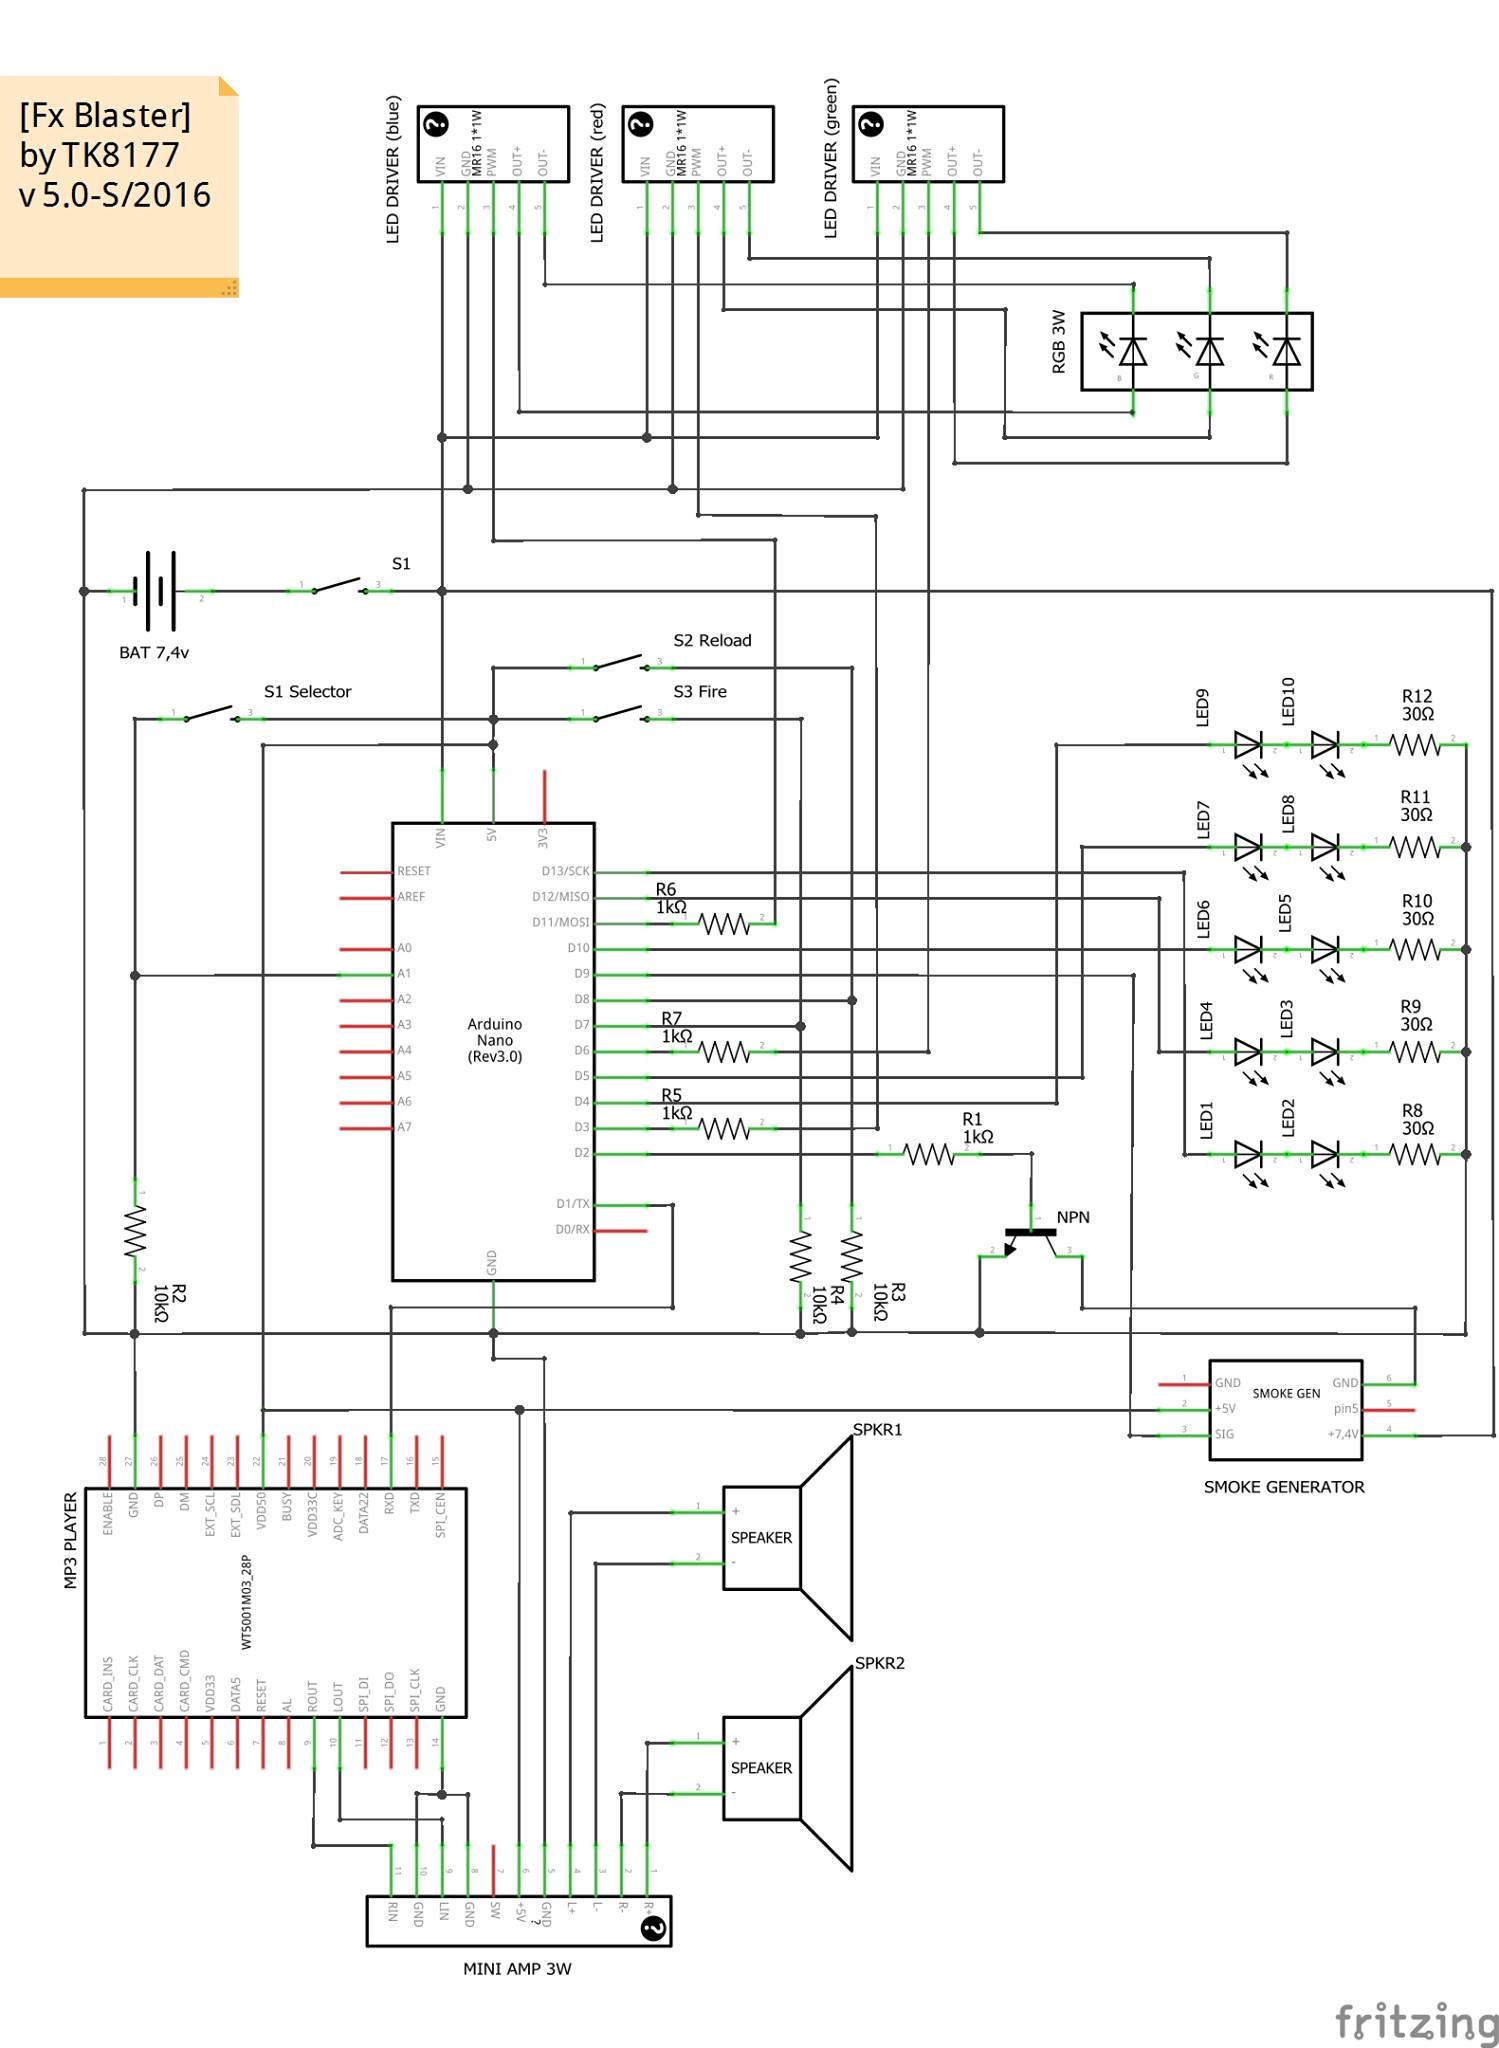
Main Scheme
Power supply: 7,4V – 9V max
Latest update scheme v.5.0.1 with DF PLAYER sound board (last update: oct. 9th 2017 ) tested and working

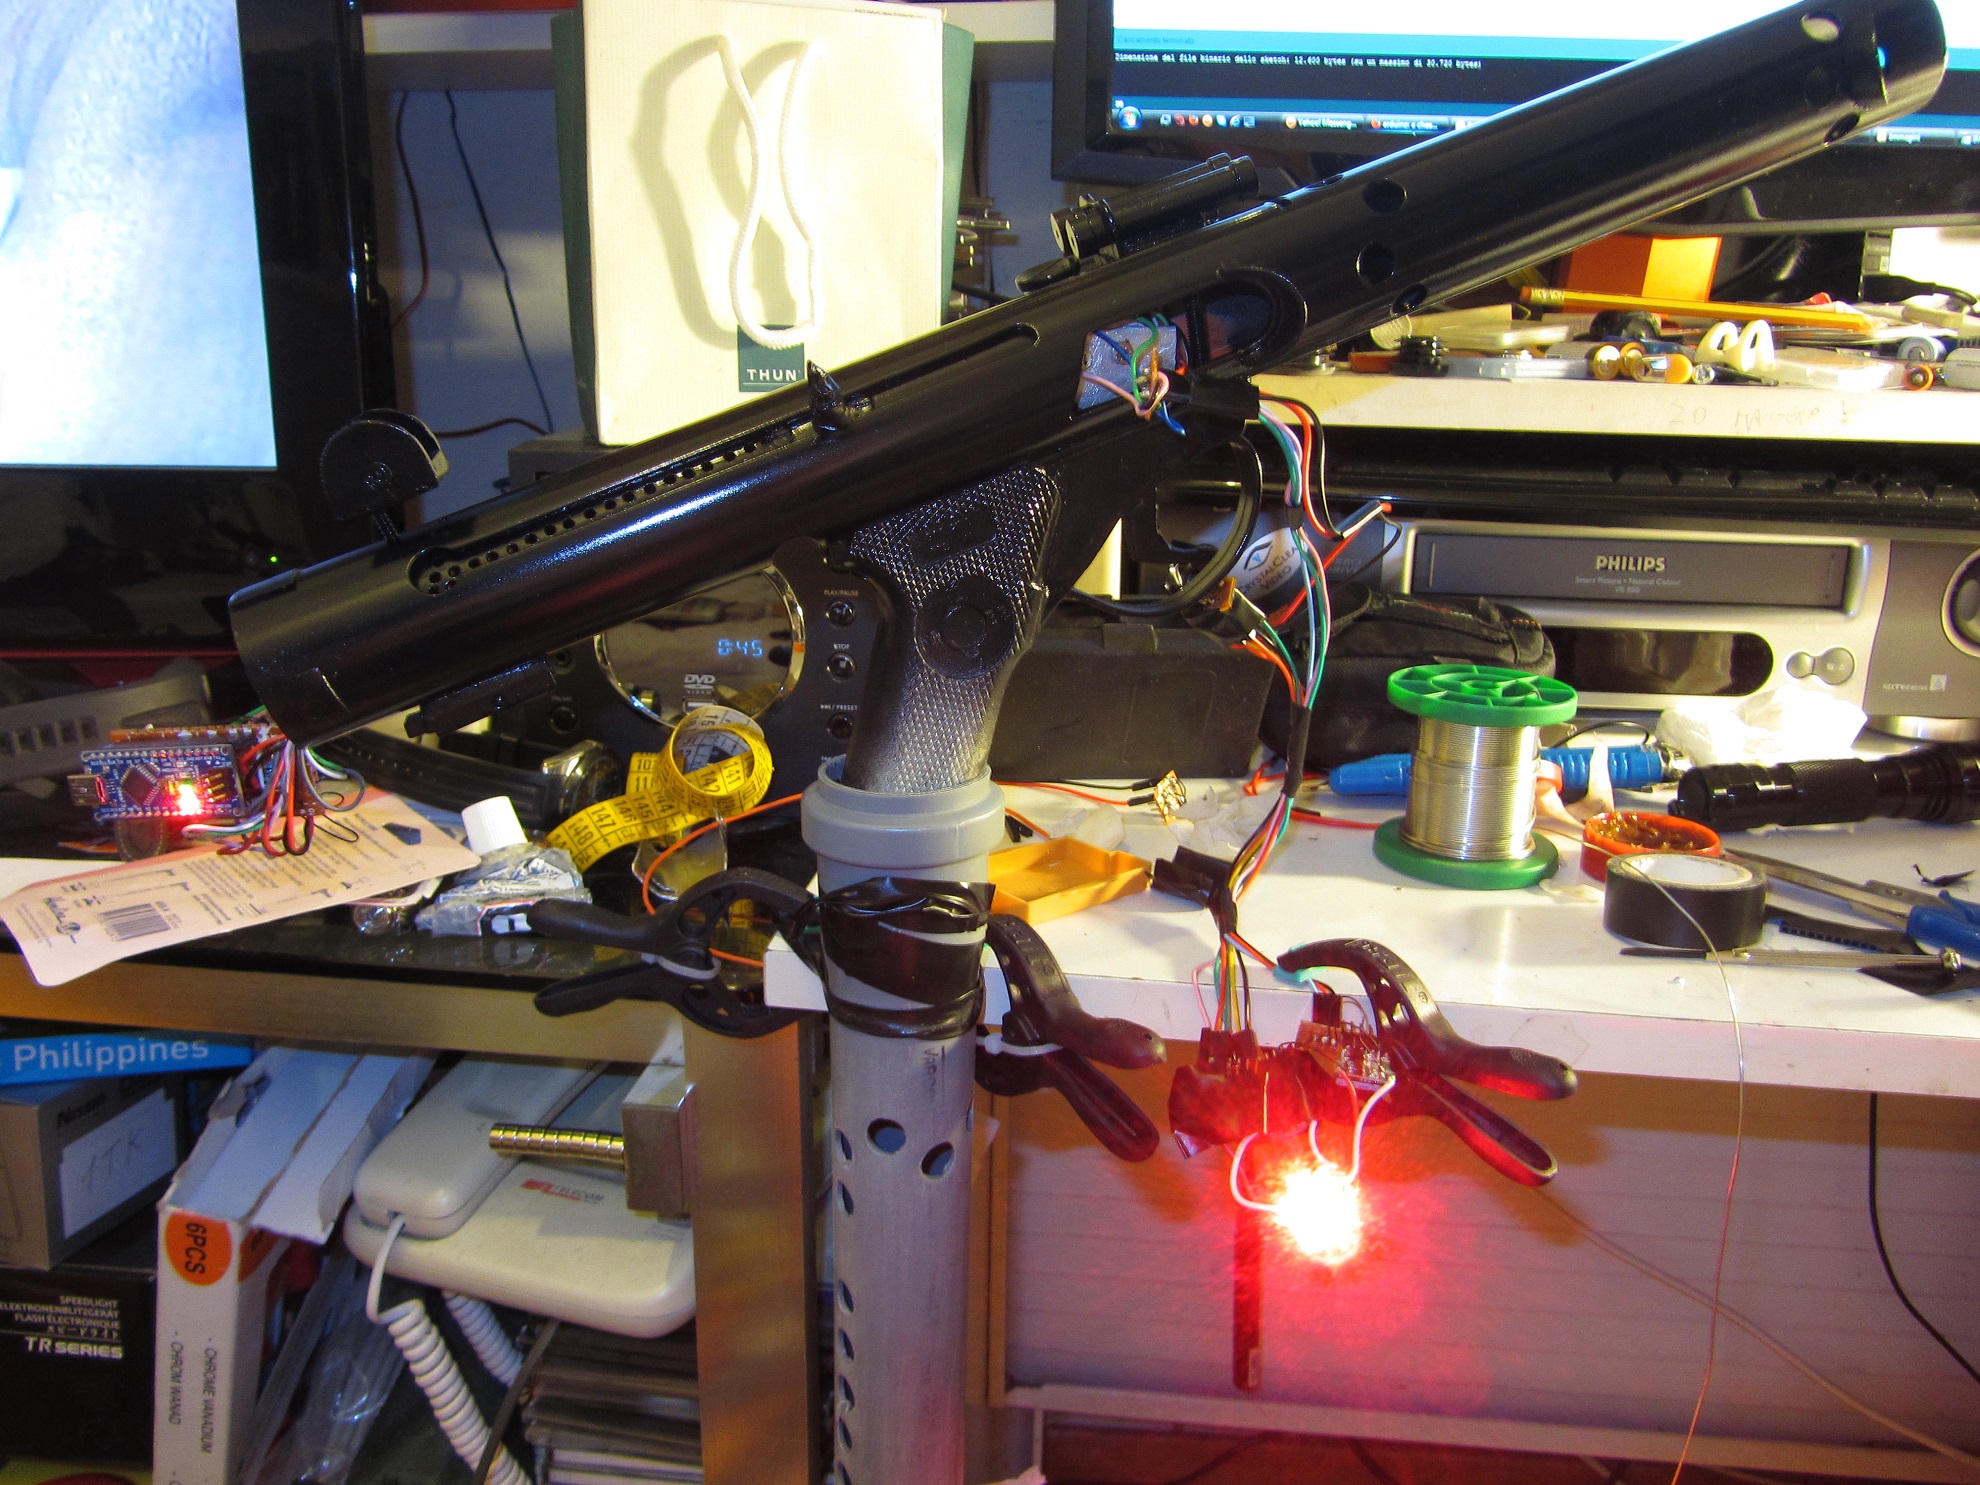
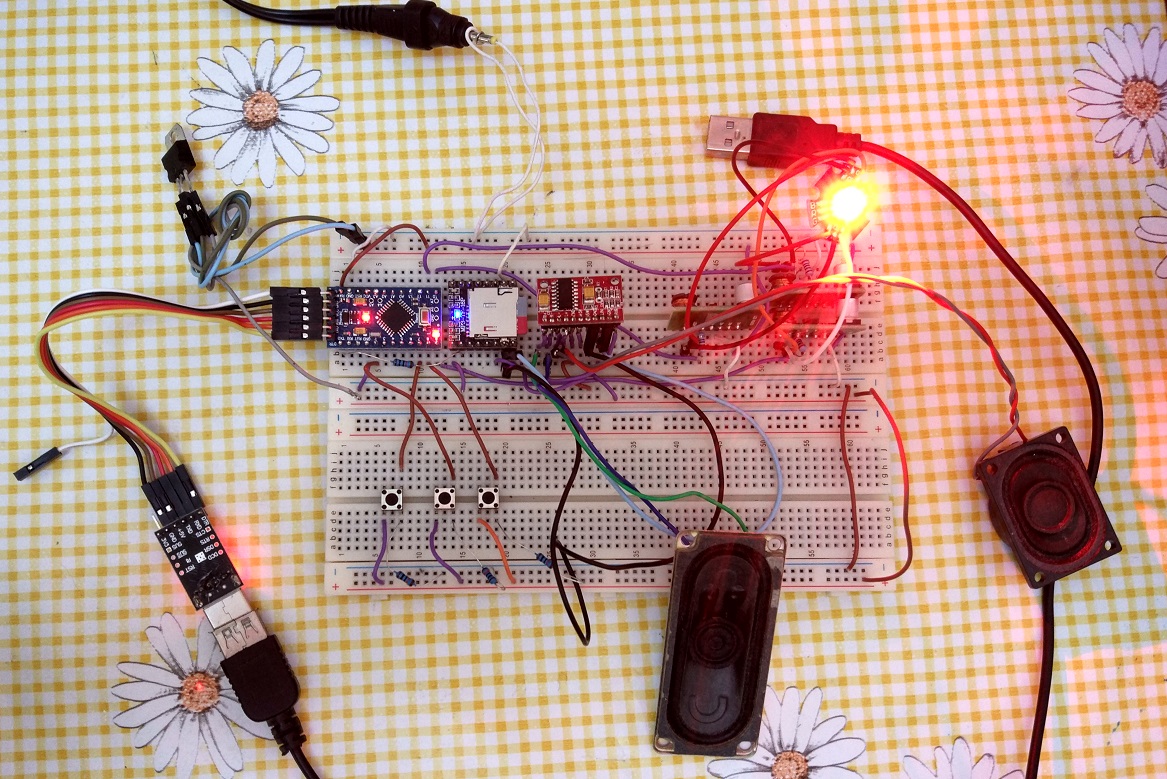
Picture of the assembled boards (note: bar led counter not installed)
Discontinued schemes:
old scheme with WT5001 sound board
List of Components
the list doesn’t include tools like solder, tin lead with paste and battery, sd card..
1) ARDUINO
#1 Arduino Pro Mini 5v At Mega 328
should be installed on the back of the pvc pipe, pay attention 328 version (that means 32kbytes of space for programming) avoid the 168 v.2.0!
#1 Arduino USB to TTL adapter needed to load code to the board
2) SOUND MODULE
#1 DFPlayer mp3 sound board
A small and reliable sound module. Rread both MP3 and WAV files. Sound quality, build in amplifier, easy to handle (everything via serial commands, only TX and RX module to Arduino),
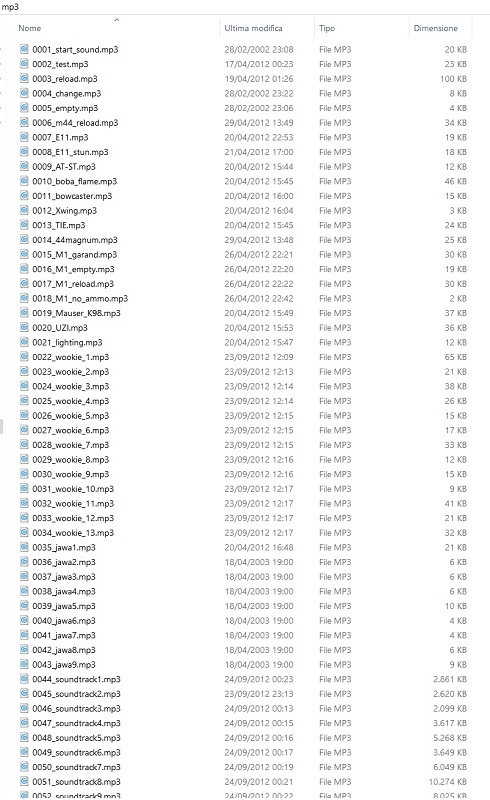
When you put files on the card, you should first create one “MP3” folder (@ root level) and put your MP3 files in that folder.
Audio file must be named 0001.mp3, 0002.mp3…..0255.mp3 (4 letters not 2 or 3 letters)
Audio file names can have any characters after 4 digits, such as 0001_Bruno_Mars_Count_On Me.mp3
A ready to use mp3 list of sound files is available, just contact me.
It uses a micro SD card to store all MP3 files up 32GB!
A library is needed in order the code works, just download it from here (click on Clone or Dowload button, then Download Zip) and unzip to your “documents\arduino\libraries” folder.
like this C:\Users\YourName\Documents\Arduino\libraries\DFPlayer_Mini_Mp3
This sound board is better associated with a 5V Positive Voltage Regulator to provide power in order to reduce EMI. I used a L7805CV.
1k ohm / 10 k ohm resistor between arduino’s RX, TX and DFPlayer’s Tx,Rx is also needed.
For any other sound modules used in the past in this project, read here.
3) SOUND AMPLIFIER AND SPEAKERS
#2 speakers 3 watt or higher that fit the E11 pipe inner diameter and leave enought space to fit the cables. Speakers impendance best at 4ohm.
i used this on my set:
http://www.ebay.com/itm/220734504352?ssPageName=STRK:MEWNX:IT&_trksid=p3984.m1497.l2649
4) LED AND DRIVERS
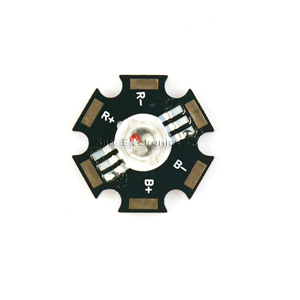
#1 RBG 3 watt (Red Blue Green) superbright led
NOTE the led must have all the 6 pin (anode and cathode) as the one linked
#3 350mA Constant Current Regulated LED Driver
needed to power the RGB led and control colors by pwm output of Arduino
#1 10 SEGMENT LED BAR GRAPH DISPLAY – i used Kingbright DC-7G3HWA 3 green + 7 red bars but you may use any other color scheme; it should find place inside the hengster counter, working as ammo status display

5) OTHER COMPONENTS (SWITCH, RESISTORS..)
#5 resistors 30 ohm for bar graph led
#3 resistors 1 kohm for output pins (pwm RGB led)
#3 resistors 10 kohm for pull-down buttons (selector, trigger, reload)
#1 resistor between 1 kohm and 10 kohm for TX/RX arduino/sound module as suggested in the manual of DF player mp3, in order to keep EMI low (i tested 10 kohm and maybe works better)
#1 microswitch for trigger
#1 momentary switch normally connected (normally close) for weapon selector (installing hole 6 mm) – u can get also a normally open but the code need mod
#1 Momentary DPDT Normal OFF-(ON) TOGGLE SWITCH for weapon reload
#1 Slide Switch for main power ON/OFF
one or two circuit boards to manually resize, where to solder the bar graphs and some connectors
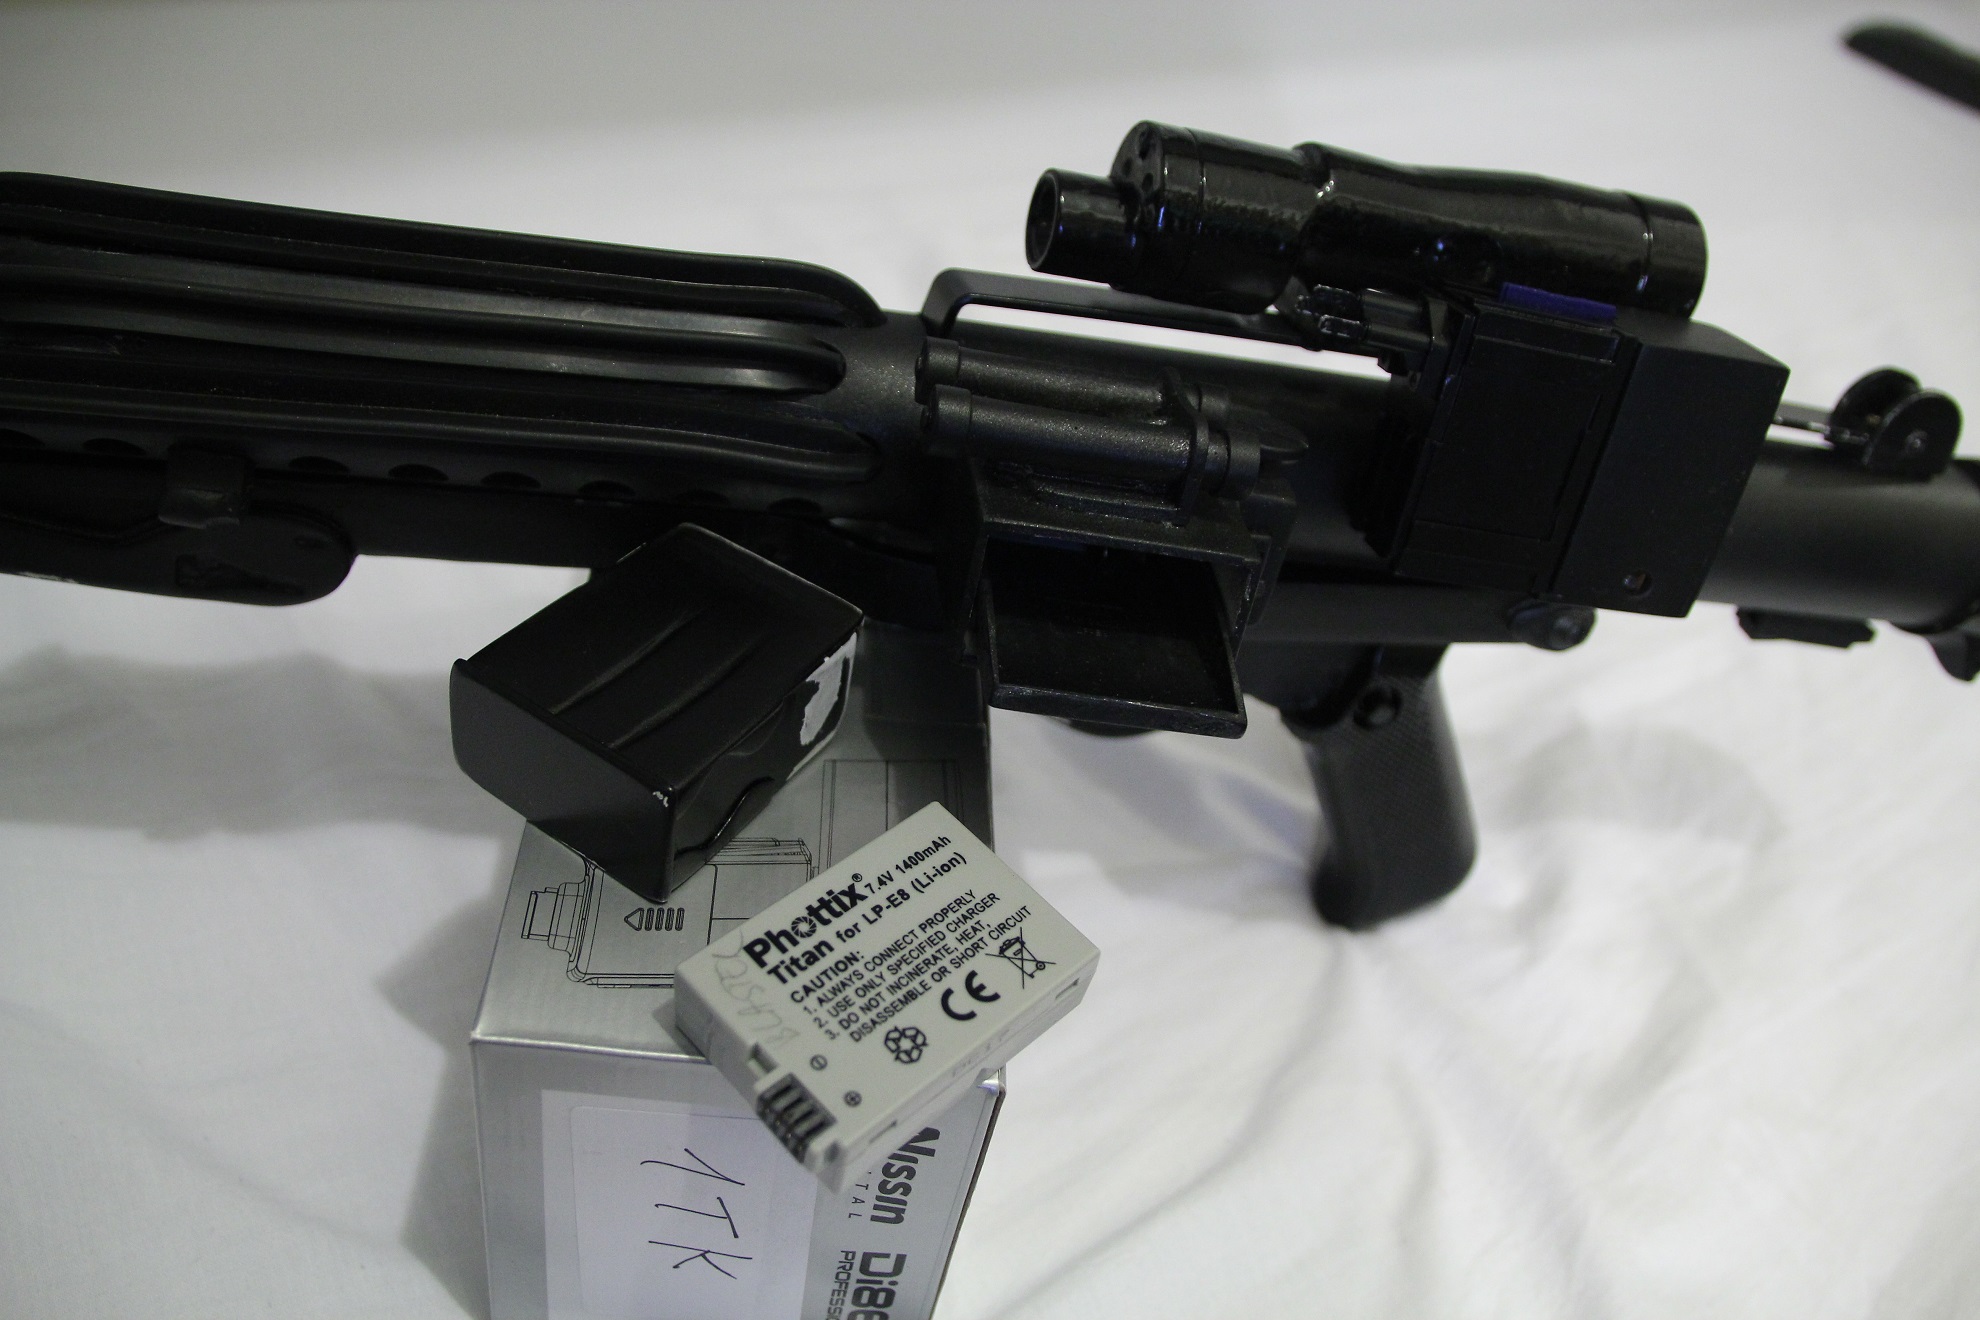
6) BATTERY
any battery or set of batteries with total voltage between 7.4 and 12 volts
1) Camera lithium batteries
On my project i used a lithium LP-E8 Phottix battery 7,4volts 1400mAh (last c.a. 7 hours), but its dimensions (55.00 x 36.98 x 15.40 mm) needed a little modification of the receiver (5 mm larger). Anyway i strongly recommend to use a lithium battery sold as Camera original battery replacement of a well known (but not too expensive) brand (as Phottix, Weiss..). Avoid unbranded oem batteries , i read many bad stories about them (explosions..) and the amperage often is not real.
Actually, the smallest 7,4 volts camera battery found is the Nikon EN-EL1(Dimension:52.00×32.20×15.70 mm), 800mAh.
Same suggestion for the charger (VHBW sells very cheap charger for most any lithium camera battery).
As battery holder you may use a cutted charger plate, it’s a safe and cheap choice and they sell for mostly any camera battery.
2) 2×18650 3,7v lithium batteries (7,4v) [not tested]
Because of its size, good amperage and right voltage, you may also use 2x 18650 batteries in series (7,4volts total). As showed here, best brands are Panasonicand Sanyo.
As battery holder you will need any 2x cells holder in series
If you are going to use these batteries, probably you will place the arduino in the magazine receiver, and the cells inside the rear part of the pipe. In this way modification of the magazine/receiver size is not needed.
3) 2xCR123 lithium batteries 3,7v, series connected (7,4v) [not tested]
4) Airsoft battery
A battery like this one might be an alternative if you already own a lipo charger.
===================
[Download] Sound fonts:
please contact me here or facebook page
[Download] Code:
Latest update: E11_ver_05_DFPlayer
Discontinued: e11_ver_04_02L_WT5001
you need the software from Arduino home page to edit and to upload it to the board
Appendix
SMOKE EFFECT (OPTIONAL)

needed:
– a smoke machine from RC car toys, sold for about 20 euro over ebay china (oil included)
– a standard NPN transistor like 2n2222
the scheme with smoke machine feature:
arduino code with smoke effect: download here (Servo Library already included in arduino) .
Have any complete guns you want to sell by chance?